One of the fastest ways beginners panic during PC gaming is seeing high GPU temperatures for the first time.
The fans get louder.
The PC feels warmer.
The GPU temperature climbs higher than expected.
Suddenly the beginner starts thinking:
“Is my graphics card overheating?”
“Am I damaging my computer?”
“Did I build something incorrectly?”
For video games as a hobby, this is an extremely common experience.
The important thing to understand is that GPUs are designed to generate heat during gaming.
Warm temperatures alone do not automatically mean something is wrong.
The real goal is learning the difference between normal gaming heat and actual cooling problems.
Once beginners understand that difference, troubleshooting becomes much less stressful and much more manageable.
If you’re still learning how gaming graphics cards affect temperatures and performance, our Beginner’s Guide to Gaming GPUs can help you understand the basics before troubleshooting cooling issues.
The Beginner Who Thought Every High Temperature Was Dangerous
Imagine a beginner playing a demanding game for the first time on their new gaming PC.
Everything works correctly, but after an hour they notice:
- Loud GPU fans
- Warm air coming from the case
- GPU temperatures reaching higher numbers than expected
The beginner immediately assumes the system is overheating.
They start searching online and quickly become overwhelmed by extreme advice:
- “Your cooling is terrible.”
- “You need more fans.”
- “Your GPU is running too hot.”
Now imagine a more methodical beginner.
Instead of panicking, they first ask:
“Is the GPU actually showing signs of a cooling problem?”
They check for:
- Sudden shutdowns
- Severe FPS drops
- Crashes
- Constant thermal throttling
- Extremely unstable temperatures
But none of those things are happening.
The game still runs smoothly.
The system remains stable.
The beginner realizes something important:
Warm GPUs during gaming are normal.
The real issue is not heat itself—it is uncontrolled heat that affects stability and performance.
That realization changes the entire troubleshooting process.
Learn the Difference Between Warm and Problematic
GPUs naturally produce heat because they are processing graphics constantly during gaming.
That is normal behavior.
For beginners, the first step is identifying whether the system is actually struggling.
Common signs of real cooling problems include:
- Sudden FPS drops after long gaming sessions
- Frequent crashes or shutdowns
- Extreme fan noise constantly at maximum speed
- GPU temperatures staying unusually high even during lighter gaming
- Noticeable thermal throttling or stuttering
- Performance becoming worse as the PC heats up
If those problems are not happening, your GPU may simply be operating normally.
This creates an important beginner decision rule:
A warm GPU is normal. An unstable GPU is the real warning sign.
Now focus on prevention and recovery.
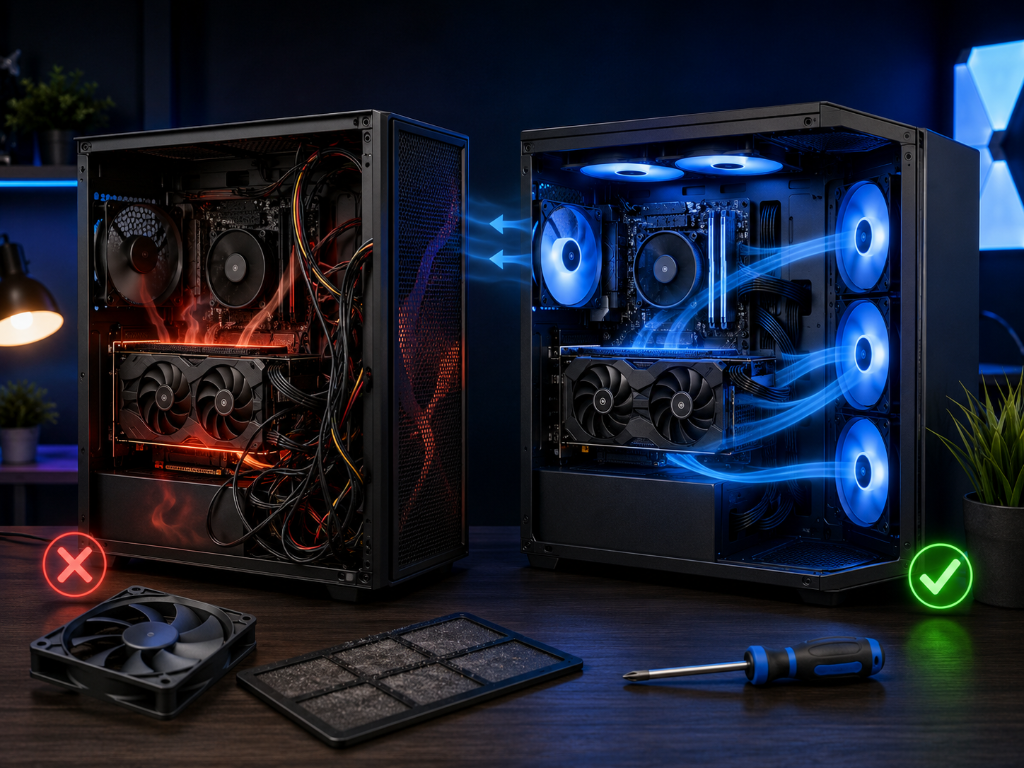
Step 1: Improve Basic Airflow
Make sure the PC case has room to move air properly.
Avoid:
- Blocking vents
- Pushing the case tightly against walls
- Placing objects directly over airflow areas
- Trapping the PC inside enclosed furniture without ventilation
You will know airflow is improving if:
- Temperatures stabilize
- Fan noise becomes less aggressive
- Gaming performance feels more consistent
- Heat escapes the case more efficiently
Another important beginner habit:
Keep front intake areas and rear exhaust areas unobstructed.
Good airflow works best when cool air can enter and hot air can leave the case easily.
Step 2: Clean Dust Regularly
Dust buildup restricts airflow over time.
Even a good cooling setup can struggle if dust blocks:
- Fans
- Filters
- Heatsinks
- Air vents
Simple cleaning often solves beginner temperature problems surprisingly quickly.
A soft brush, compressed air, or dust cleaning routine can make a noticeable difference.
Step 3: Adjust Graphics Settings if Necessary
Higher graphics settings create more GPU workload.
If temperatures become excessive during demanding games, try:
- Lowering Ray Tracing
- Reducing shadows
- Limiting FPS
- Lowering unnecessary Ultra settings
- Using DLSS or FSR if available
This often improves both temperatures and stability quickly.
A useful beginner expectation:
Maximum settings are not always worth the extra heat and fan noise.
Step 4: Upgrade Cooling Only If Necessary
Not every beginner needs extra case fans or expensive cooling upgrades immediately.
Start with:
- Better airflow
- Dust cleaning
- Stable fan operation
- Sensible graphics settings
Then consider additional cooling upgrades later only if real performance or temperature problems continue consistently.
For many beginners, simple airflow improvements solve the problem without major hardware changes.
Check Your Airflow Before Assuming the Worst
GPU cooling is like a car radiator system: heat is normal while the engine is working, but problems start when airflow can no longer remove that heat efficiently.
Right now, do this quick cooling check:
- Look for blocked airflow areas around your PC
- Check for visible dust buildup
- Monitor GPU temperatures during one gaming session
- Listen for constant maximum fan speeds
- Watch for crashes, stuttering, or thermal throttling
If the system feels stable, your GPU is probably functioning normally.
Start with simple airflow improvements first.
Most beginner cooling problems are fixable without replacing major hardware.
After improving your GPU airflow and stability, explore more practical setup and optimization strategies in our Setup Zone category page.
Leave a Reply